I love this #tbt Olga's tag as she shows perfectly how to use those smaller stamps on a larger project. Love all the accents too. See her video below on how she created it.
Today we continue to spotlight Olga's videos. This is the first ever video she made for Swedish House Crafts. It is something a little different - decorating a tray. Sit back relax and enjoy the video and a calorie free macaron!
Have you watched our very own Olga from the DT videos? These videos are so wonderful and deserve to be seen again - this one alone has had 6.6k views!!!
This week we are spotlighting the videos. You will learn a lot and be inspired to use your stash, I promise you!
At the end of the week Olga will have a new video for us!
This is a seasonal make from October 2017 - watch and enjoy.
I have recently become a happy black cat owner and this little gift is meant for a wonderful lady who gave me the cat :) There are some cans of cat food plus a toy mouse inside.
I have wrapped the box in a kraft paper (this is the kind of paper that I use for nearly all my gift wrapping!). Then I added some splatters, attached a red ribbon and a handmade tag on top.
The tag itself features Origami Cat die by Gummiapan. I have paired it with fractal embossed pattern and added a sentiment made with my very own alphabet stickers created with a sticker maker machine.
Watch the video tutorial where I explain all the tips and tricks!
Don't forget that the HUGE Summer Sale is going on at Swedish House Crafts! It's a great time to get anything you want for half the price!
Thanks for joining me today, have a wonderful day!
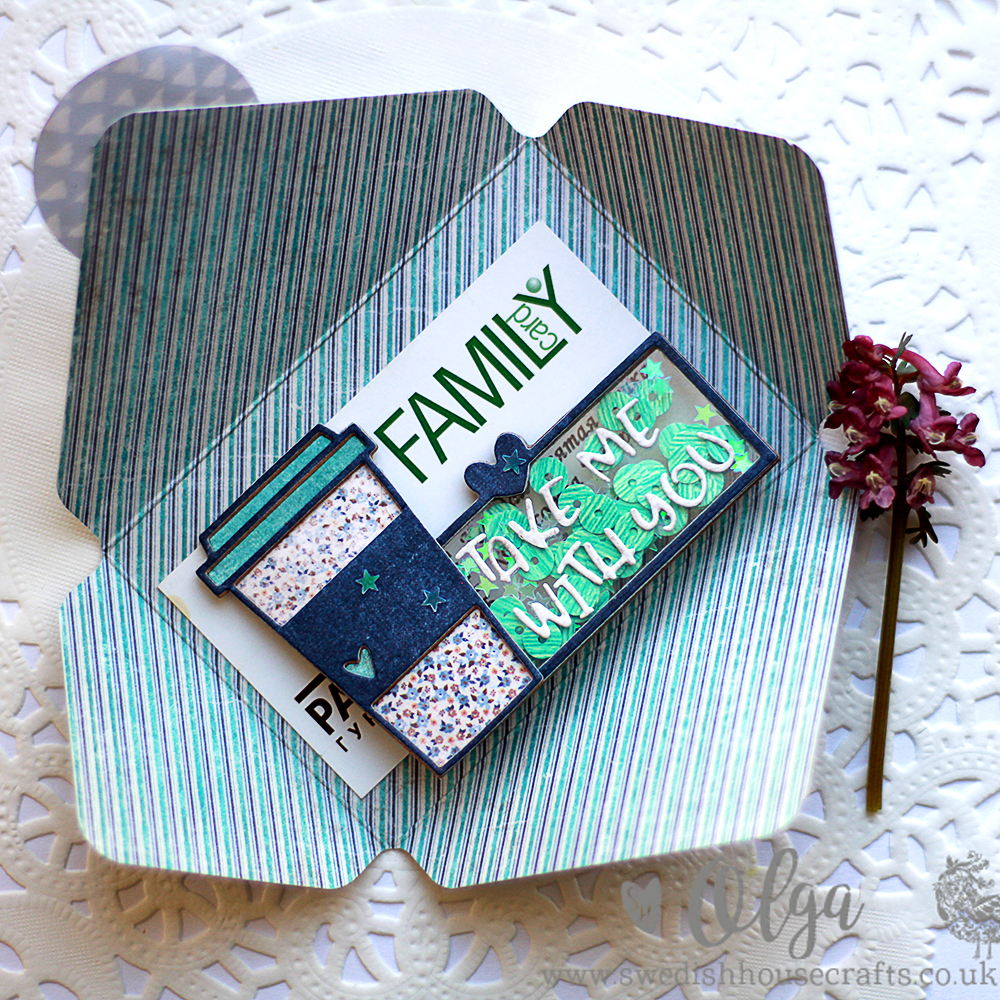
Hello everyone! Today I have created a mini envelope to put a gift card to a coffee place into. Plus I have created a tiny shaker card to fit into that envelope as well. It is very similar to a placement card because it is meant to be standing upright on a surface. I have decided to make this card completely clear and use sequins to create a colorful background.
I absolutely love the new alphabet die by Gummiapan (see the supply list below) that I used to create a sentiment. Most of alphabet dies on the market are medium to large size and only good for large focal sentiments, but with this little guy you can create smaller inscriptions and even do longer phrases! Because the letters are this freehand funky style you don't need to line them up - they look just fine when they are "dancing" on your card!
The whole process of creating this card is disclosed in the video tutorial below:
Hi, it's Olga, thanks for joining me! Today I am presenting a spring themed project - a shaker card that measures 4,25'' x 4, 25''.
I have used some Gummiapan dies (see the supply list below) to create a shape of a card, a shaker frame as well as leafy branches. Daffodils are made with Magnolia dies. I have also performed some heat embossing on acetate using the wonderful product by Crafter's Companion.
I will also explain in a video tutorial below how to create a shaker element with an intricate die that is not thick enough to place any foam adhesive behind it.
Watch the video tutorial for the full step by step guide on how to put this card together:
Thanks for visiting, I hope you enjoyed the project and found some of the ideas worth trying!
Hi crafty friends, today is the Pocket Letter time! :)
If you are wondering what Pocket Letters is it is a 9 pocket plastic page that you fill with DIY decorated cards to create a nice composition. Then you can swap Pocket Letters with your crafty friends and build up your own collection of them!
To create this letter I have used a bunch of Gummiapan wildflower stamps (gosh I love wildflowers!) as well as a couple of their beautiful sentiment stamps. I have also used Gummiapan's Old Letter die set to create vellum overlays for each card.
Look how tiny this "Just Because" stamp is - and mind that I have actually used the bigger one from the set!
Watch the step by step VIDEO TUTORIAL to learn how this project is made:
Thanks for visiting and I hope to see you again soon!
Hi paper crafters and thank you for joining me today!
The project I have created this time is a coffee themed St. Valentine's Day tag:
I have combined several dies from different Swedish producers and also added some stamping on vellum for the background. I like the idea of using a keyhole plate as a logo on a coffee sleeve. I think if I were to open my own cafe I would definitely use this idea.
NOTE: The mini stamp by Magnolia I have used is now discontinued BUT Swedish House Crafts has a huge collection of them for 60% less than the market price.
If you would like to see how to make this tag please watch a beginning to end video tutorial:
I hope you enjoyed today's project, please come back again for more creative inspiration!
For today's greeting card I have decided to create my own Galaxy background but instead of using inks or paints I am using some black and white glitter.
I bet you have also noticed a wonderful and unique Little Dipper with Star dies by Magnolia and an embossed acetate window. Don't forget to look inside the card as well!
Watch the video tutorial for the step by step guide!
You can never have enough Holiday tags - that is why I am going to make 3 more of them today. They can be used individually or as a set.
Now the good news! As a Holiday Gift for you Swedish House Crafts online store is giving 5% discount for all their dies that I have used for this project. Just use the code JG6AX8X02 at checkout!
I hope you enjoyed today's project and the tutorial! Happy Holidays!
Hi paper crafters! I hope you are having fun preparing for the Holidays.
Today I have created a clean and simple watercolour card - not something I normally do but I really enjoyed the process!
Once I saw this fabulous sleeping angel die by Magnolia I knew I wanted to use it for the Holiday project - and here it is - my vision of the peace on Earth. :)
Want to know how to make this card? Please find step by step instructions in the video below:
Thank you for visiting today! More inspirational projects are coming soon!
Hello, it's Olga. My project for today is an Advent Calendar card - yes, it is an Advent Calendar that can actually be mailed in an envelope!
I have combined several different stamps to create this cute Christmas scene. The card turned out to be flat and mailing friendly. I also used some "scratch here" stickers to make the calendar with - watch the video to see how it was done!