
Hello, everyone!
For the next three days on Swedish House Crafts blog I'm going to be showcasing some picture tutorials.
For my first tutorial, I am going to be showing you how to make a Swedish mail box to hold Christmas tags. Links to the products are in text, and can be found at the end of my post.

I used the gorgeous new Maja Design "Joyous Winterdays" collection to decorate the mail box. The lace, and flower pearl trim are from my stash. I decorated the sides of the box with the papers. I didn't decorate the back, but there was plenty of the paper left over to use if you wanted to do that.

I stamped Gummiapan Merry Christmas text sentiment onto a piece of cardstock, and cut it out to fit behind a decorative chipboard frame.
I made the larger flowers with the papers, and Gummiapan flower 3 dies. The white paper flowers are from the store, and the 10mm open roses are from my stash. For the foliage I used Gummiapan little twigs die. I coated the flowers, and decorative chipboard with Snow-Tex.
I made the larger flowers with the papers, and Gummiapan flower 3 dies. The white paper flowers are from the store, and the 10mm open roses are from my stash. For the foliage I used Gummiapan little twigs die. I coated the flowers, and decorative chipboard with Snow-Tex.

I used Gummiapan nesting stitched rectangles to cut out the image, and stamped the top corner with Gummiapan Angelpost stamp. I adhered a tiny blue rhinestone to the centre of the snowflake, and added some glamour dust to the snowballs, and snow on the ground.

To make the tags. I cut out the images that I had left over from "Vintage Frost Basics" diecut sheet, and inked the edges with Tim Holtz Vintage photo distress ink. I used scrunched seam binding, and twine to thread through the eyelets that I made in the top of the tags.
I hope you like what I achieved?
Now on to the tutorial.

You will need; Scoring board, paper trimmer, card (I used 280gsm card) scissors, ruler, pencil, and glue or sticky tape.

Cut a sheet of A4 card to 27cm x 19cm.

Position the card landscape on the scoring board, and score at 1cm, 9cm, 14cm, and 22cm.
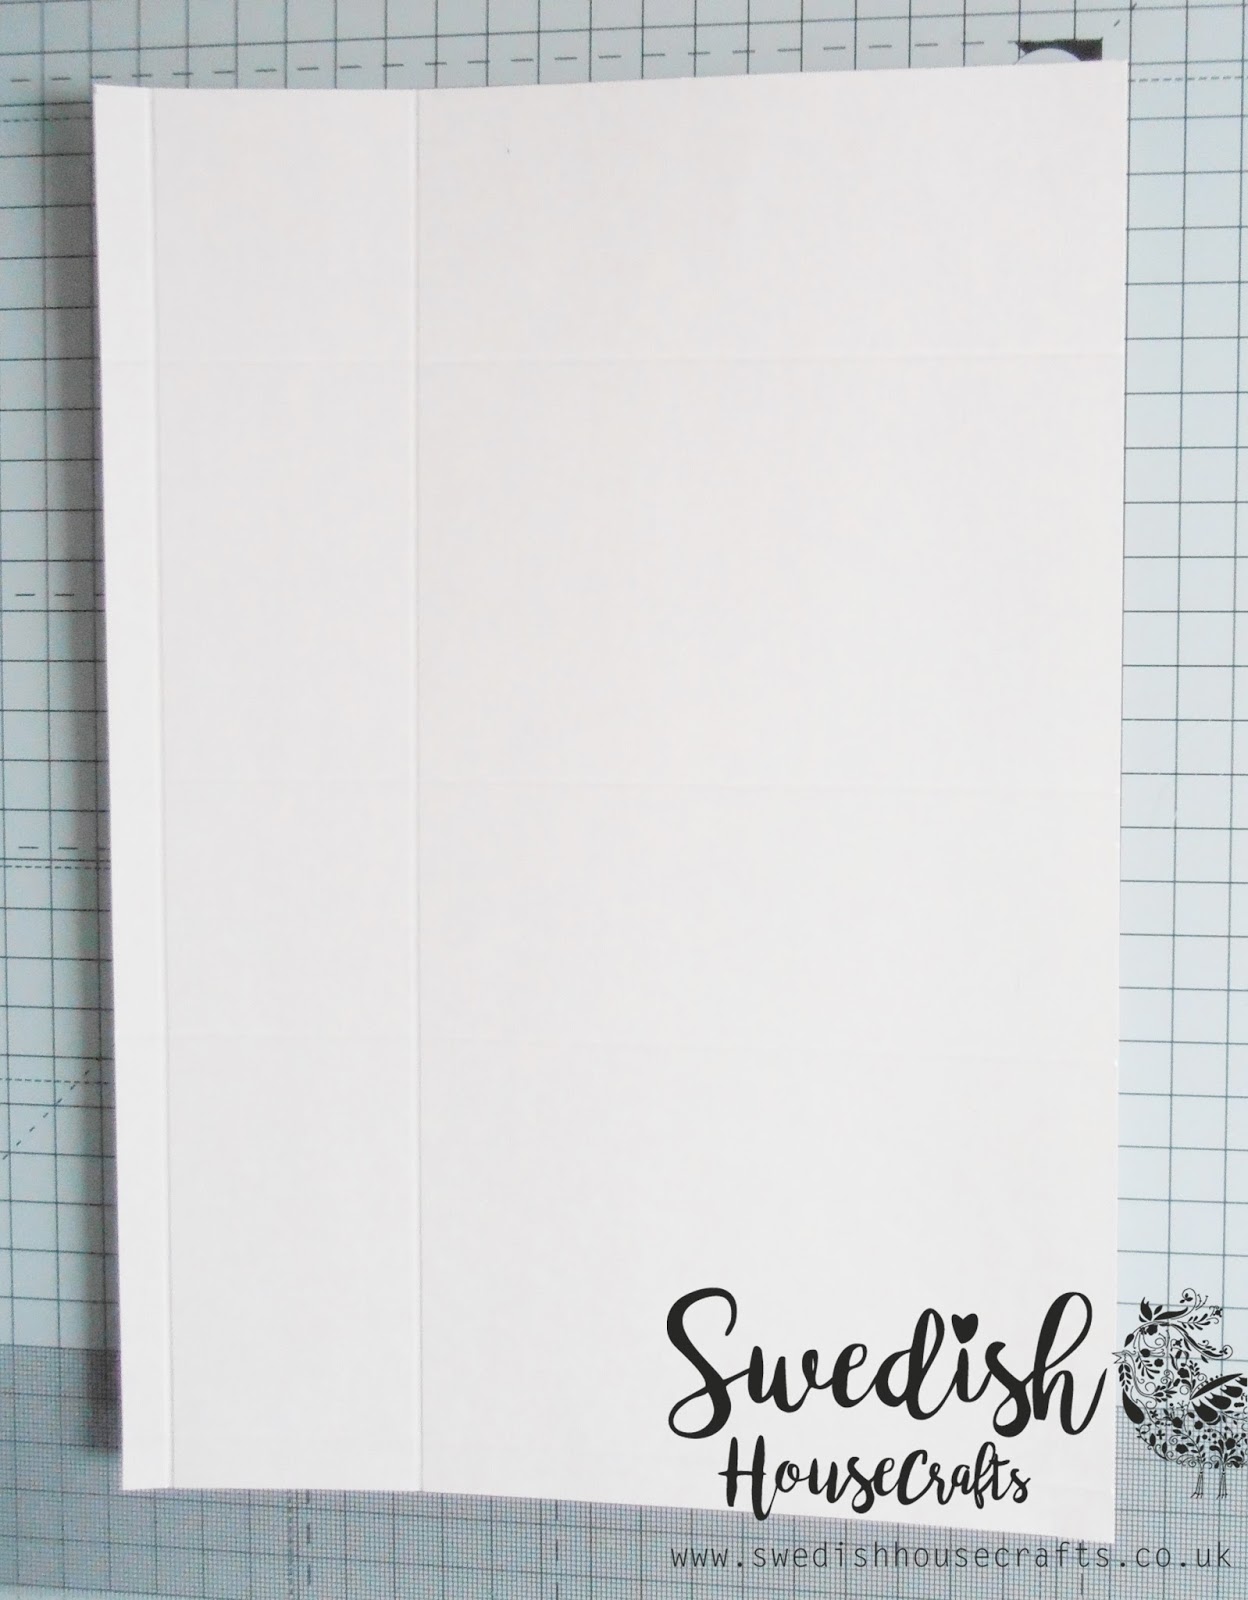
Position the card portrait, and score at 1cm, and 6cm.

Position the card landscape and score 2cm down where I have marked with a pencil.
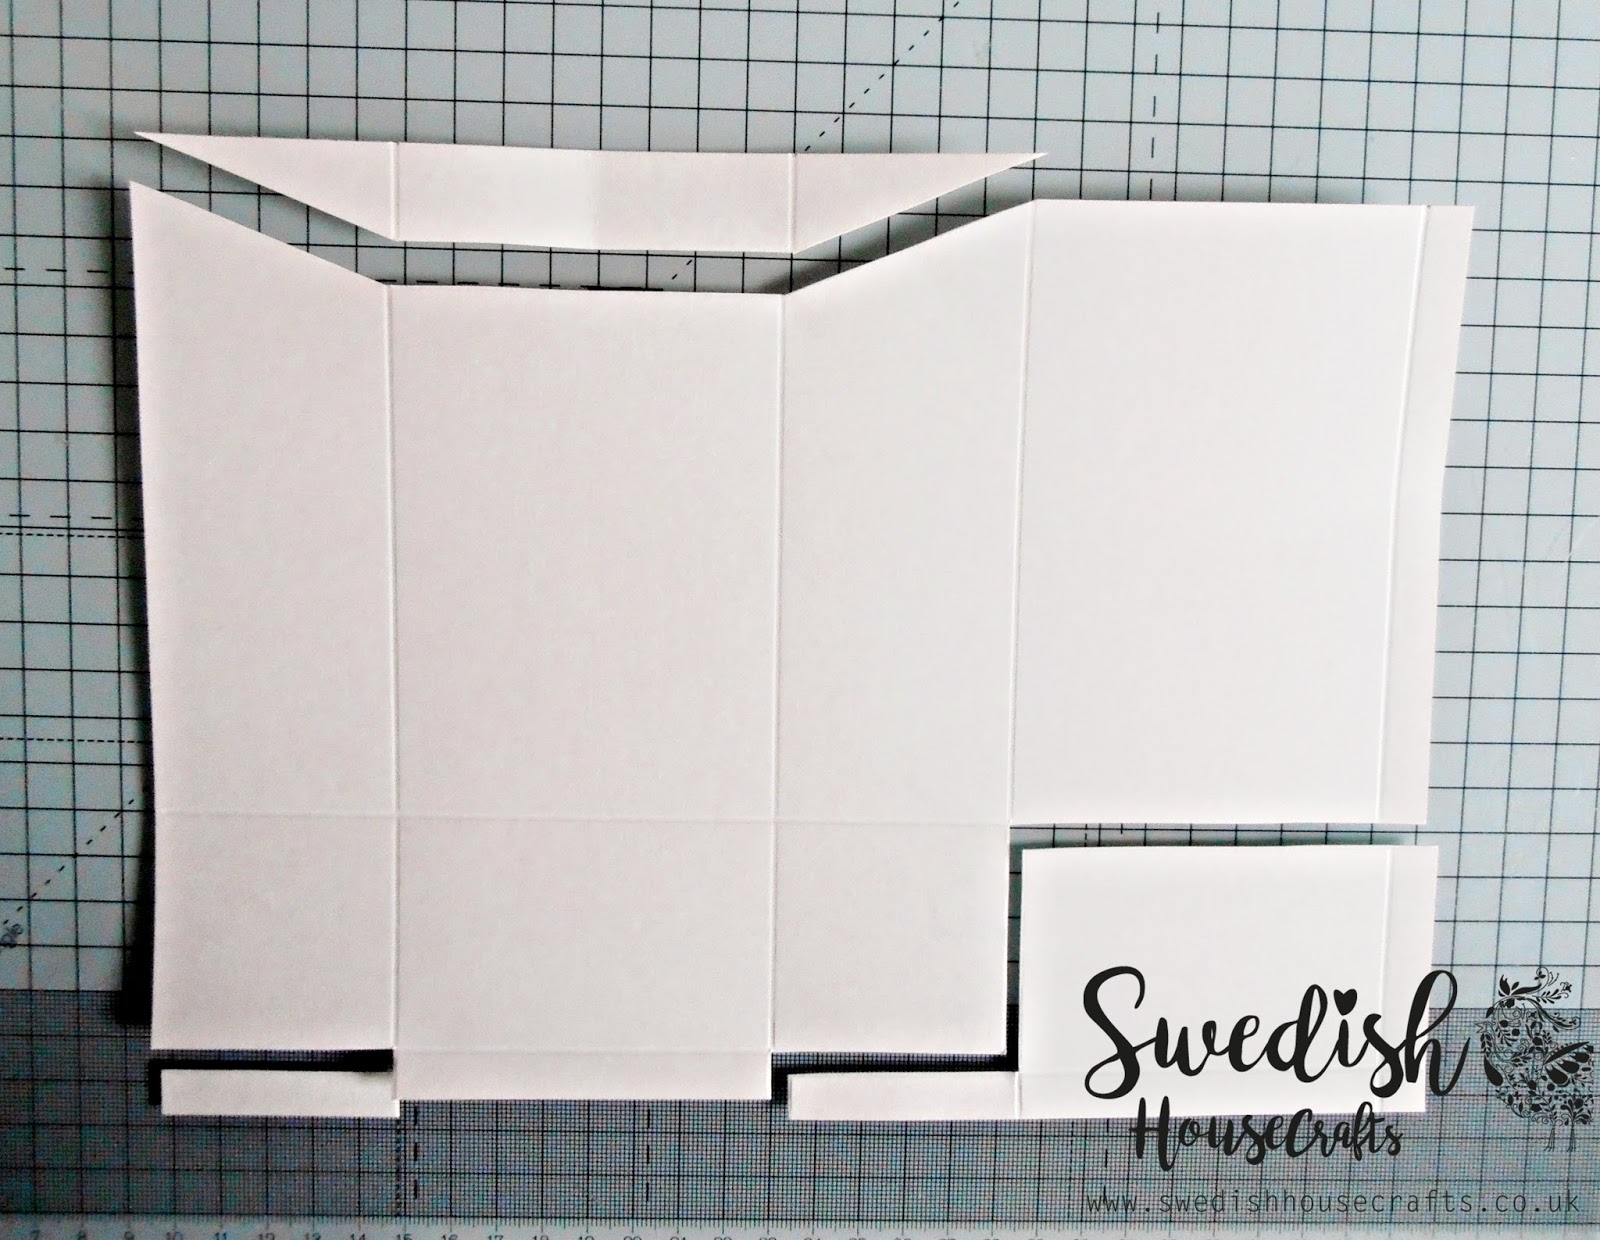
With the card landscape cut out the areas shown as above.

Using the scissors cut up to the score lines as shown above, and fold in the score lines.
You can then start to assemble the mail box with glue or sticky tape.

Once assembled, the first part of the mail box should look like the picture above.
Use scissors to snip off the corner at the top of the box.

To make the lid you will need to cut a piece of card measuring 10cm x 8cm.

Score, and fold 1cm in from the top of the card.
With the score line folded in, you will have a piece of card Measuring 9cm x 8cm.

Using a pencil, mark in 1cm each side of the folded edge, and cut up, and along the score lines to remove a square from each corner. You now have your lid ready to place inside the mail box.

Assemble the lid to the inside of the box as shown above, using glue or sticky tape.

Ta Dah!
One Swedish mail box to hold your Christmas tags.
I hope that I have inspired you to make a Swedish mail box.
Below are links to the products available from the store that I have used to decorate my mail box.
Thank you for stopping by!


2 comments
This is so beautiful! I love the colours and the papers. You've definitely inspired me to have a go at making the post box. Thank you for the picture tutorial! x
ReplyDeleteThank you Carole.
DeleteI'm pleased that I have inspired you!
I would love to see your mail box......Hugs xx
If you want to make someone happy today, what would you say? Leave a word to the team :D